Table of Contents Link to heading
- Introduction
- Setup
- Database Connection
- Server and Router
- Database Migrations
- Configuration File
- Conclusion
Introduction Link to heading
In this series we will be building a RESTful service for a fictitous social media app that will allow authentication, following and unfollowing users, creating updating and deleting posts, and getting a homepage for a user. We will be using the Go programming language. Our database will be PostgreSQL. Some of the libraries we use will inlcude Chi, SQLC, testify, and docker for some of our unit tests.
The Go version used in this tutorial is go1.20.3 darwin/amd64. You can find the version of Go installed on your machine by typing go version in the terminal. This tutorial assumes you have a decent understanding of Go and SQL.
Setup Link to heading
Let’s initialize our app. Make a directory where you will store the project. Alternatively, you can clone the initial commit from here which is just an empty project with a near empty README. The remainder of the work in this chapter will be done in this branch.
Make the following folders within the project directory:
mkdir cmd
mkdir pkg
mkdir pkg/api
mkdir pkg/repository
And create the entrypoint to the app:
touch cmd/main.go
The folder structure should look like this:
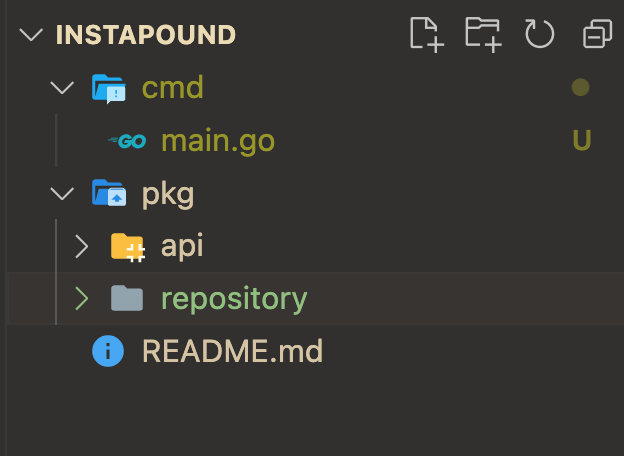
Inside the cmd directory, add a file maine.go. This is the entrypoint for the project. Every Go package must have a name. Let’s call the package inside cmd, main. Add the following inside main.go:
package main

import (
	"fmt"
	"os"
)

func main() {
	err := run()
	if err != nil {
		fmt.Fprintf(os.Stderr, "Error starting server: %s\n", err)
		os.Exit(1)
	}
}

func run() error {
    fmt.Println("running app...")
}
The main() function will get called automatically when we run the app. In order to run the app, type this command into the terminal from the root of the project:
go run cmd/main.go
You shoulds see the message, running app..., output in the terminal. We’re going to be running the app a lot, so let’s make it easy to do so without needing to type this long command every time. Let’s create a Makefile. The make utility is a tool that allows us to execute complex tasks with simple commands. You can read more about make here. Paste the following command in the terminal at the root of your project:
touch Makefile
Then open up Makefile and paste in this code:
.PHONY: run

run:
	go run cmd/main.go
This creates an executable task named run that will run the app for us. In order to execute this task, type in the terminal:
make run
Makefiles are very useful, and we will be adding more tasks to it soon.
Database Connection Link to heading
For this app, we will be using PostgreSQL. When we write our database integration unit tests, we will be interfacing with an instance of Postgres that is running inside Docker. But for our main project, I prefer to have Postgres installed and running on my machine. This step is not crucial, you can install Postgres on your machine any way you want. Just make sure it’s installed and running on a port that you have access to. I am using PostgreSQL version 12, and am using PG Admin as the GUI to interface with the database.
Once you have the database installed, add the following to your main.go file:
func setupDB(dbDriver string, dbSource string) (*sql.DB, error) {
	db, err := sql.Open(dbDriver, dbSource)
	if err != nil {
		fmt.Printf("Error opening connection to DB: %v", err)
		return nil, err
	}

	// ping to make sure it's connected
	err = db.Ping()
	if err != nil {
		fmt.Printf("Failed to ping DB: %v", err)
		return nil, err
	}

	return db, nil
}
and update the run() method to:
func run() error {
	_, err := setupDB("postgres", "postgresql://username:password@localhost:5432/db_name?sslmode=disable")
	if err != nil {
		fmt.Println(err.Error())
		return err
	}
	return nil
}
But replace username, password and db_name with the values you setup when you created your database. If you try running the project now, you will get an error that will contain something like this:
unknown driver "postgres" (forgotten import?)
We need to import the lib/pq library in order to be able to connect to Postgres. Add this import to main.go:
_ "github.com/lib/pq"
We will then want to download this library, but before we do that, let’s initialize our go.mod file. Modules are how Go manages dependencies, and the go.mod file will show all of our dependencies. So initialize the mod file by running this command in the terminal at the root of the project:
go mod init instapound
This initializes a module named instapound and should create a file called go.mod in the root of the project. One way to install the our project’s dependencies, which in this case so far is only the lib/pq library, is to run this in the terminal:
go mod tidy
This will look through all the packages and imports in them and downloand the needed dependencies.
Your go.mod file should look like this:
module instapound

go 1.20

require github.com/lib/pq v1.10.9
You should never need to manually update this file yourself. The go mod CLI tool should do it all for us. Now if you try to run the app, you should not encounter any errors.
We will come back to the database soon, in order to hook it up to our server. But first, let’s create the server.
Server and Router Link to heading
Let’s create the server object. Inside pkg/api directory, create a file server.go. Inside the file, add the following:
package api

import (
	"fmt"
    "net/http"
)

type Server struct {
	router *chi.Mux
}

func NewServer(
	router *chi.Mux) *Server {
	return &Server{
		router: router,
	}
}

func (s *Server) Run() error {
	fmt.Println("Starting server on port 8080")

	return http.ListenAndServe(":8080", s.router)
}
For now, our server will only hold a pointer to the router that we will be using. Chi is a third party library for routing. You will see errors, because Chi is not downloaded. Download it by running:
go get -u github.com/go-chi/chi/v5
You should see the go.mod file update, and you should be able to import Chi:
import (
	"fmt"
	"net/http"

	"github.com/go-chi/chi/v5"
)
Now that we have the multiplexer on our server object, let’s get connect the router to the http server and start listening for requests. Open main.go, and update the run() method to this:
func run() error {
	_, err := setupDB("postgres", "postgresql://postgres:viking@localhost:5432/instapound_dev_go_main?sslmode=disable")
	if err != nil {
		fmt.Println(err.Error())
		return err
	}

	router := chi.NewRouter()
	server := api.NewServer(router)
	err = server.Run()
	if err != nil {
		return err
	}
	return nil
}
If you run the app now, make run, you will see the following output in the terminal:
Starting server on port 8080
In order to stop the server, type CTRL-C in the terminal. Excellent, we now have our server running and listening to http requests. If you open up your browser while the server is running, and type in localhost:8080, you should see a webpage with content:
404 page not found
Let’s add some routes to our server. Inside server.go add the following method:
func (s *Server) Routes() {
	router := s.router

	router.Get("/", func(w http.ResponseWriter, r *http.Request) {
		w.Write([]byte("Welcome to InstaPound!"))
	})
}
We’re adding a public method Routes() on the Server object. And inside the method, we’re declaring an http handler in the root path, / for GET requests. Now if we get a request at http://localhost:8080, we will respond with the text “Welcome to InstaPound!”. There is just one more step to get this working. Update the Run() method to this:
func (s *Server) Run() error {
	s.Routes()
	fmt.Println("Starting server on port 8080")

	return http.ListenAndServe(":8080", s.router)
}
Try for yourself, restart the server and go to that URL in your browser.
Let’s add a couple of routes to allow users to login and to register. Inside pkg/api, create a new file user.go and add the following to it:
package api

import "net/http"

func (s *Server) loginHandler(w http.ResponseWriter, r *http.Request) {
	w.Write([]byte("Login"))
}

func (s *Server) registerHandler(w http.ResponseWriter, r *http.Request) {
	w.Write([]byte("Register"))
}
These are two http handlers defined on our Server object, and for now they only return some string. Let’s connect them to our router. Open server.go and update the Routes() method to this:
func (s *Server) Routes() {
	router := s.router

	router.Get("/", func(w http.ResponseWriter, r *http.Request) {
		w.Write([]byte("Welcome to InstaPound!"))
	})

	v1ApiRouter := chi.NewRouter()
	router.Mount("/api", v1ApiRouter)

	v1ApiRouter.Group(func(r chi.Router) {
		r.Route("/auth", func(r chi.Router) {
			r.Post("/login", s.loginHandler)
			r.Post("/register", s.registerHandler)
		})
	})
}
Chi allows us to group multiple handlers together. In this case, we are grouping the login and register routes inside an auth path group. And the /auth is inside the router /api. The full URL for the login route would be localhost:8080/api/auth/login. Now that we have our router and handlers attached, let’s implement the database layer. Before we can add the logic for registering and logging in users, we need to add our database model schema and be able to interact with our database from the app. Let’s do that next.
Database Migrations Link to heading
We need to create the schema for our database. Start off by creating a directory migrations inside /pkg/api/. We will be using the library migrate. First, let’s install it. This page has the installation instructions for all the different operating systems. Once you have it installed on your machine, run this command to create the first migration files:
migrate create -ext sql -dir pkg/repository/migrations -seq initial
This should create two files in your /migrations directory, 000001_initial.up.sql and 000001_initial.down.sql. These tow files are empty. How it works is when you run migrations, the library will go through all of the up files and apply the schema changes to the database in sequential order. The down files are there to the opposite of apply of schema changes, they are used to undo schema changes. Let’s go ahead and and the scheme changes to 000001_initial.up.sql:
CREATE EXTENSION IF NOT EXISTS "uuid-ossp";

BEGIN;

CREATE TABLE IF NOT EXISTS "base_table" (
id uuid NOT NULL DEFAULT uuid_generate_v4 (),
created_at TIMESTAMP WITH TIME ZONE DEFAULT CURRENT_TIMESTAMP NOT NULL,
updated_at TIMESTAMP WITH TIME ZONE DEFAULT CURRENT_TIMESTAMP NOT NULL
);


create table IF NOT EXISTS "user" (
active boolean NOT NULL DEFAULT true,
email varchar(255) UNIQUE NOT NULL,
role VARCHAR(255) NOT NULL,
password varchar(255) NOT NULL,
user_name varchar(255) UNIQUE NOT NULL,
PRIMARY KEY (id)
) INHERITS ("base_table");

CREATE INDEX idx_user_email
ON "user" (email);
CREATE INDEX idx_user_id
ON "user"(id);

CREATE TABLE IF NOT EXISTS "post" (
content VARCHAR(255) NOT NULL,
user_id uuid NOT NULL,
CONSTRAINT user_id
    FOREIGN KEY(user_id)
    REFERENCES "user"(id)
    ON DELETE CASCADE,
PRIMARY KEY (id)
) INHERITS ("base_table");

CREATE TABLE IF NOT EXISTS "post_likes" (
    post_id uuid NOT NULL,
    CONSTRAINT post_id
        FOREIGN KEY(post_id)
        REFERENCES post(id),
    user_id uuid NOT NULL,
    CONSTRAINT user_id
        FOREIGN KEY(user_id)
        REFERENCES "user"(id)
        ON DELETE CASCADE,
PRIMARY KEY (post_id)
) INHERITS ("base_table");

-- --
-- `being_followed_id` is the id of the user who is being followed by someone
-- --
CREATE TABLE IF NOT EXISTS "followers" (
    being_followed_id uuid NOT NULL,
    CONSTRAINT being_followed_id
        FOREIGN KEY(being_followed_id)
        REFERENCES "user"(id)
        ON DELETE CASCADE,
    following_id uuid NOT NULL,
    CONSTRAINT following_id
        FOREIGN KEY(following_id)
        REFERENCES "user"(id)
        ON DELETE CASCADE,
PRIMARY KEY (being_followed_id)
) INHERITS ("base_table");

COMMIT;
This sql file creates all the tables and relations we will need for our project. If down the line we want to make changes or additions to the schema, we will simply re-run the migrate command and pass in another name, not initial, and add our changes to the generated files. Now let’s add the changes in the 000001_initial.down.sql file:
DROP TABLE IF EXISTS "post_likes";
DROP TABLE IF EXISTS "post";
DROP TABLE IF EXISTS "followers";
DROP TABLE IF EXISTS "user";
DROP TABLE IF EXISTS "base_table";
The down migration in this case simply deletes all the tables that up version creates. There are two ways to run these migrations. The first way is via CLI commands. Let’s run the up migration. Run this command in your terminal:
migrate -database "postgresql://username:password@localhost:5432/db_name?sslmode=disable" -path pkg/repository/migrations version
Replace the username, password and db_name with your values. This should return something that says there are no migrations. Now if you run this:
migrate -database "postgresql://username:password@localhost:5432/db_name?sslmode=disable" -path pkg/repository/migrations up
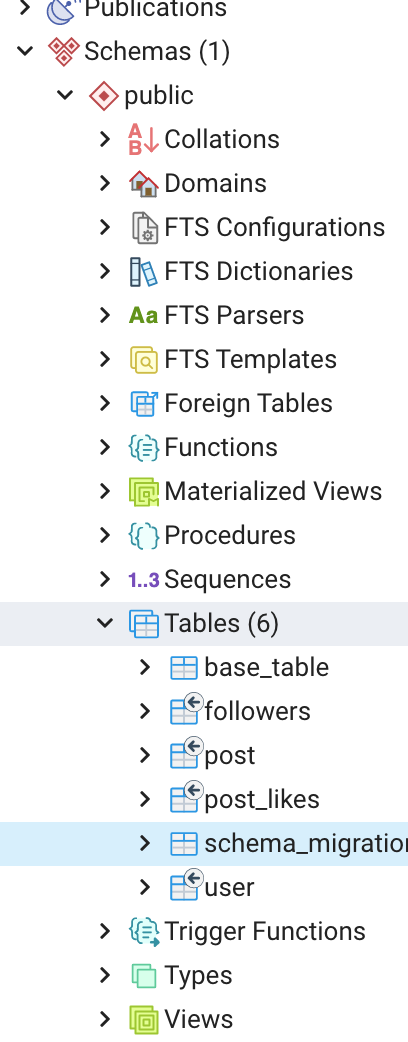
You should get some sort of success response like “1/u initial (247.181384ms). And if you run the version` command again, you should see output “1”. You should connect to your database and make sure that all of those tables have been added to it. If you are using PG Admin like me, you should see the following tables under the schemas:
Now let’s undo that schema change:
migrate -database "postgresql://username:password@localhost:5432/db_name?sslmode=disable" -path pkg/repository/migrations down
The reason we’re doing this is because we don’t want to run our migrations via CLI. For our project, we will add code that will automatically run migrations every time we run the project. Create a new file:
touch pkg/repository/storage.go
And then inside the file, add the following:
package repository

import (
	"database/sql"
	"fmt"

	"github.com/golang-migrate/migrate/v4"
	_ "github.com/golang-migrate/migrate/v4/database/postgres"
	_ "github.com/golang-migrate/migrate/v4/source/file"
	_ "github.com/lib/pq"
)

type AppStorage interface {
	RunMigrations(connectionString string, migrationPath string) error
}

type appStorage struct {
	db *sql.DB
}

func MakeAppStorage(db *sql.DB) AppStorage {
	return &appStorage{db: db}
}

func (s *appStorage) RunMigrations(dbSource string, migrationPath string) error {
	m, err := migrate.New(migrationPath, dbSource)
	if err != nil {
		fmt.Println(err)
		return err
	}

	fmt.Println("Running migrations...")

	err = m.Up()
	if err != nil {
		if err.Error() == "no change" {
			fmt.Println("No new migrations to apply")
		} else {
			return err
		}
	}

	version, _, err := m.Version()
	if err != nil {
		fmt.Println("No migrations have been applied yet")
	} else {
		fmt.Println("Current migration version:", version)
	}

	return nil
}
We’re maing an AppStorage object that has a single public function. This function is what we will call to run the migrations. We pass in the paths for the database and also the path to where our migration files live. Then we run the Up migrations. And finally, we check the version and log out some simple informative text via prints. Make sure you copy the imports exactly as posted above. And then, let’s run our trusty go mod command to download the necessary libraries:
go mod tidy
Now open up main.go and update the run() method to:
func run() error {
	db, err := setupDB("postgres", "postgresql://username:password@localhost:5432/db_name?sslmode=disable")
	if err != nil {
		fmt.Println(err.Error())
		return err
	}

	appStorage := repository.MakeAppStorage(db)
	err = appStorage.RunMigrations("postgresql://username:password@localhost:5432/db_name?sslmode=disable", "file://pkg/repository/migrations")
	if err != nil {
		return err
	}

	router := chi.NewRouter()
	server := api.NewServer(router)
	err = server.Run()
	if err != nil {
		return err
	}
	return nil
}
Now if you run the project, you will see the schema being updated. And if you stop and re-run, you will see this output “No new migrations to apply”.
Configuration File Link to heading
You will notice the there is some repatition here with the database paths. Also, we’re hardcoding the username and password right in the code, which is a terrible security practice. Let’s fix this.
Let’s create a file where we will store all of our “secret” configuration values:
touch app_dev.env
This is a file that we do not want to commit to Git. So let’s make a gitignore file:
touch .gitignore
Open the .gitignore file and the following in there:
# Binaries for programs and plugins
*.exe
*.exe~
*.dll
*.so
*.dylib

# Test binary, built with `go test -c`
*.test

# Output of the go coverage tool, specifically when used with LiteIDE
*.out

# Dependency directories (remove the comment below to include it)
# vendor/

# Go workspace file
go.work

# configs
*.env
This will make sure that git ignores our .env file. Add this to your app_dev.env file:
DB_SOURCE=postgresql://user:passowrd@localhost:5432/dbname?sslmode=disable
DB_DRIVER=postgres
HTTP_SERVER_ADDRESS=0.0.0.0:8080
MIGRATION_PATH=file://db/migration
Replace the values with your own values. Now let’s add the code that will allow us to read this values and pass into our app. Create a directory:
mkdir utility
And add the config file:
touch utility/config.go
And inside config.go add:
package utility

import (
	"fmt"

	"github.com/spf13/viper"
)

type Config struct {
	DBDriver          string `mapstructure:"DB_DRIVER"`
	DBSource          string `mapstructure:"DB_SOURCE"`
	HTTPServerAddress string `mapstructure:"HTTP_SERVER_ADDRESS"`
	MigrationPath     string `mapstructure:"MIGRATION_PATH"`
}

type Environment string

const (
	DEV  Environment = "dev"
	TEST             = "test"
	PROD             = "prod"
)

func NewConfig(environment Environment) (config Config, err error) {
	viper.AddConfigPath(".")
	switch environment {
	case DEV:
		viper.SetConfigName("app_dev")
	case TEST:
		viper.SetConfigName("app_test")
	case PROD:
		viper.SetConfigName("app_prod")
	}
	viper.SetConfigType("env")

	err = viper.ReadInConfig()
	if err != nil {
		fmt.Println("Error loading config")
		fmt.Println(err)
		return
	}

	err = viper.Unmarshal(&config)
	return
}
You’ll notice we’re importing a library called viper. Run go mod tidy to download this dependency. We’re checking what environment we’re using. So far we’re only going to be using the dev environment. We’ll come back to testing later. Viper allows us to read in data froom configuration files. We then store the values in the Config struct. Let’s use the config values. Open up main.go and updat the run() method to:
func run() error {
	config, err := utility.NewConfig(utility.DEV)
	db, err := setupDB(config.DBDriver, config.DBSource)
	if err != nil {
		fmt.Println(err.Error())
		return err
	}

	appStorage := repository.MakeAppStorage(db)
	err = appStorage.RunMigrations(config.DBSource, config.MigrationPath)
	if err != nil {
		return err
	}

	router := chi.NewRouter()
	server := api.NewServer(router)
	err = server.Run()
	if err != nil {
		return err
	}
	return nil
}
We have replaced the hardcoded database values, along with the migration path, with the values from the configuration object. This removes all the hardcoded values, improves our security because passwords and the like are no longer in source code, and makes the code look cleaner.
Conclusion Link to heading
This is the end of part 1 of this series. We have setup our app, connected to the database, applied our schema via migrations, hooked up a couple of routers to our server, and added configuration files. In the next series, we’ll start reading from and writing to the database. If you want the code up to this point, you can checkout the branch chapter 1.